How To Measure Your Ring Size
Our hope is that when you receive your ring, it is the right size, the first time. In order to help you determine your ring size, we have created these instructions which include a video and explanations with pictures for each method. If you have specific questions, or if you have a suggestion for our video, please contact us.
Your ring size can be measured three different ways. All three methods use our
printable ring size chart. Double check that your printer prints the chart to scale by using the scale checker in the bottom left corner of the ring size chart. The scale should match up with a ruler, if it does not, then uncheck any "Scale To Fit" checkboxes, and print the chart again.
Click on the pictures to enlarge.
Print out our
Ring Size Chart:
Circumference
| A. |
 |
You need: the ring size chart, a piece of non-stretch string (dental floss works), and a metric ruler. |
C. |
 |
Measure the string's length with a metric ruler. |
| B. |
 |
Wrap the string around the biggest part of the finger you want to wear the ring on. |
D. |
 |
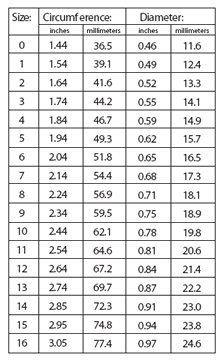
Use the conversion chart to find your ring size.
|
Ring Circles
| A. |
 |
You need: a ring that fits your finger and the ring size chart. |
C. |
 |
With one eye closed, make sure you can barely see the black when the ring is sitting on the circle. |
| B. |
 |
Place the ring over the black circles, find the circle that lines up closest with the inside of the ring. |
Sizer
| A. |
 |
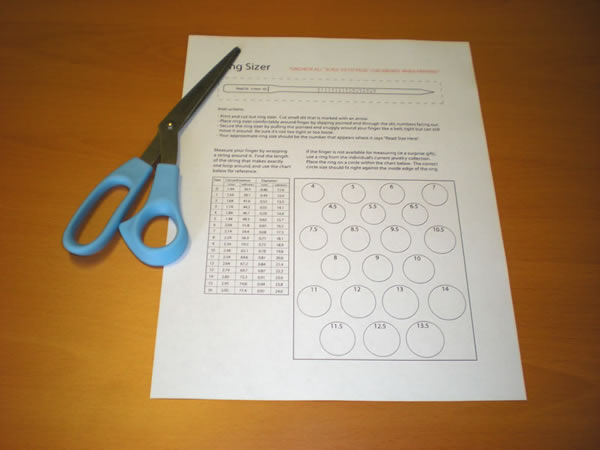
You need: a pair of scissors and the ring size chart. |
D. |
 |
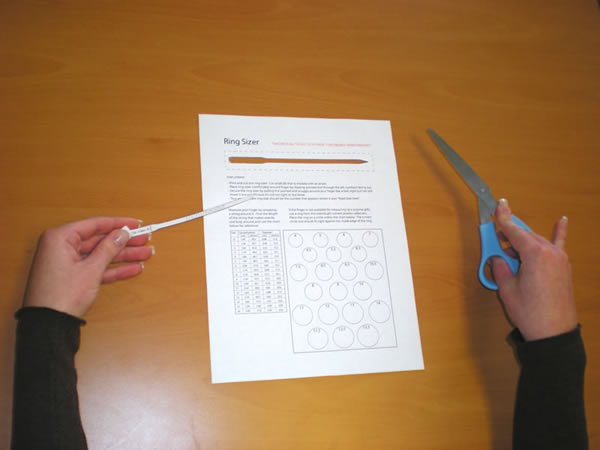
Poke the pointed end of the paper through the slit. |
| B. |
 |
Cut a slit along the black line. |
E. |
 |
Put the sizer on the biggest part of your finger. Half sizes fall between two numbers. |
| C. |
 |
Cut out the sizer along the black line. |